
Installation
Three steps: run it on your computer, connect the services inside the app and publish. You don't need to edit any files.
1. Run it on your computer
You need Node.js 20 or later.
In a terminal:
npx estudarnpx downloads the latest version and starts it; nothing is installed globally. If you'd rather have the command always at hand, run npm install -g estudar and then just estudar.
Prefer a copy of the repository?
To change the code or contribute:
git clone https://github.com/RyanTech00/estudar.git
cd estudar
npm install
npm start
It's the same server; the difference is where your keys are stored (see below).
Your browser opens by itself at the address shown in the terminal. Click Get started on the welcome page.
The link from the terminal
The Server & keys screen only opens from the link the terminal shows (http://localhost:8787/#setup=…): it carries a key that changes on every start and protects your keys from other programs. If you close the tab, copy the link from the terminal again.
With nothing else, the app already works in local mode: plan, timer, focus, logs and degree record, with data stored only in this browser. For an account, sync and AI, read on.
The app opens in your browser's language (English or Portuguese). To switch, go to Account → Language.
Port in use?
If 8787 is taken, the server tries the next one (8788, 8789…) and prints the address in the terminal. You can also choose: npx estudar --port 9000.
2. Connect Supabase and the AI
In the app, open Account (the circle in the top-right corner) → Server & keys. The screen has four numbered steps.
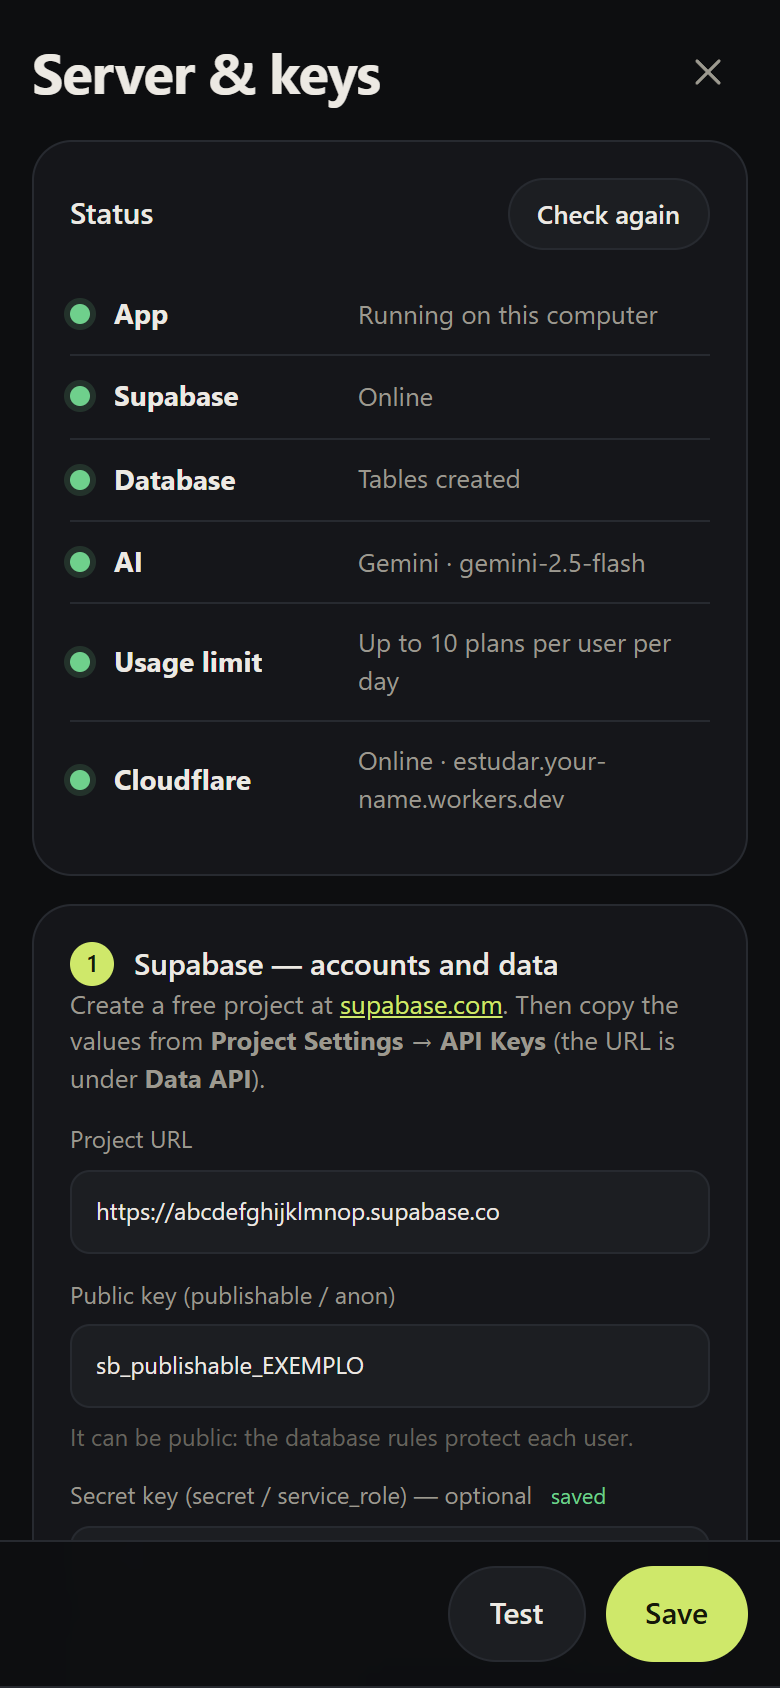
Supabase — accounts and data
Create a free project at supabase.com/dashboard/new.
On the project's home page, the Copy button next to the address gives you the Project URL and the Publishable key. The secret key (optional) is under Project Settings → API Keys, in the Publishable and secret API keys tab; the older anon and service_role keys (Legacy tab) work too. If you're going to use Automatic in step 4, pasting the Project URL is enough: both keys are filled in for you.
Paste them into step 1 on the screen.
Open Create the tables and set up the sign-in email:
- Automatic — enter your email, create a personal token (
sbp_…), paste it and click Set up. The app creates the tables and access rules, authorises the app's addresses, puts the 6-digit code in the sign-in email, creates your account and closes sign-ups: only you can get in (add more people in step 3, Who can sign in). The token is used only at that moment and is never stored.
Free Supabase projects created since June 2026
With Supabase's built-in email you can't change the sign-in email (you get a link instead of the code), and only 2 emails are sent per hour. Set up your own SMTP first — see the FAQ — and then click Set up.
- Manual — copy the SQL, paste it into the Supabase SQL Editor and run it. Then, in Authentication → Emails → Magic Link, add
{{ .Token }}to the email text.
- Automatic — enter your email, create a personal token (
What is the secret key for?
Only for the daily limit on AI generations per person (10 by default). It stays on the server only. Without it, the app works, but with no limit.
AI — generating plans
Choose the provider and paste the key:
| Provider | Where to get the key | Default model |
|---|---|---|
| Gemini (recommended to start with) | aistudio.google.com/apikey — has a free tier | gemini-2.5-flash |
| Claude | Claude Console | claude-opus-5 |
| OpenAI or compatible (OpenRouter, Groq…) | Your provider | you must specify the model; for other services, give the API URL |
Test and save
Test checks each connection with the values you've entered (without saving) and updates the status dots. Save writes them to .dev.vars and reloads the app. With npx estudar, the file lives in the .estudar folder in your home directory (~/.estudar); in a copy of the repository, it lives in the project folder (ignored by git).
3. Publish to Cloudflare
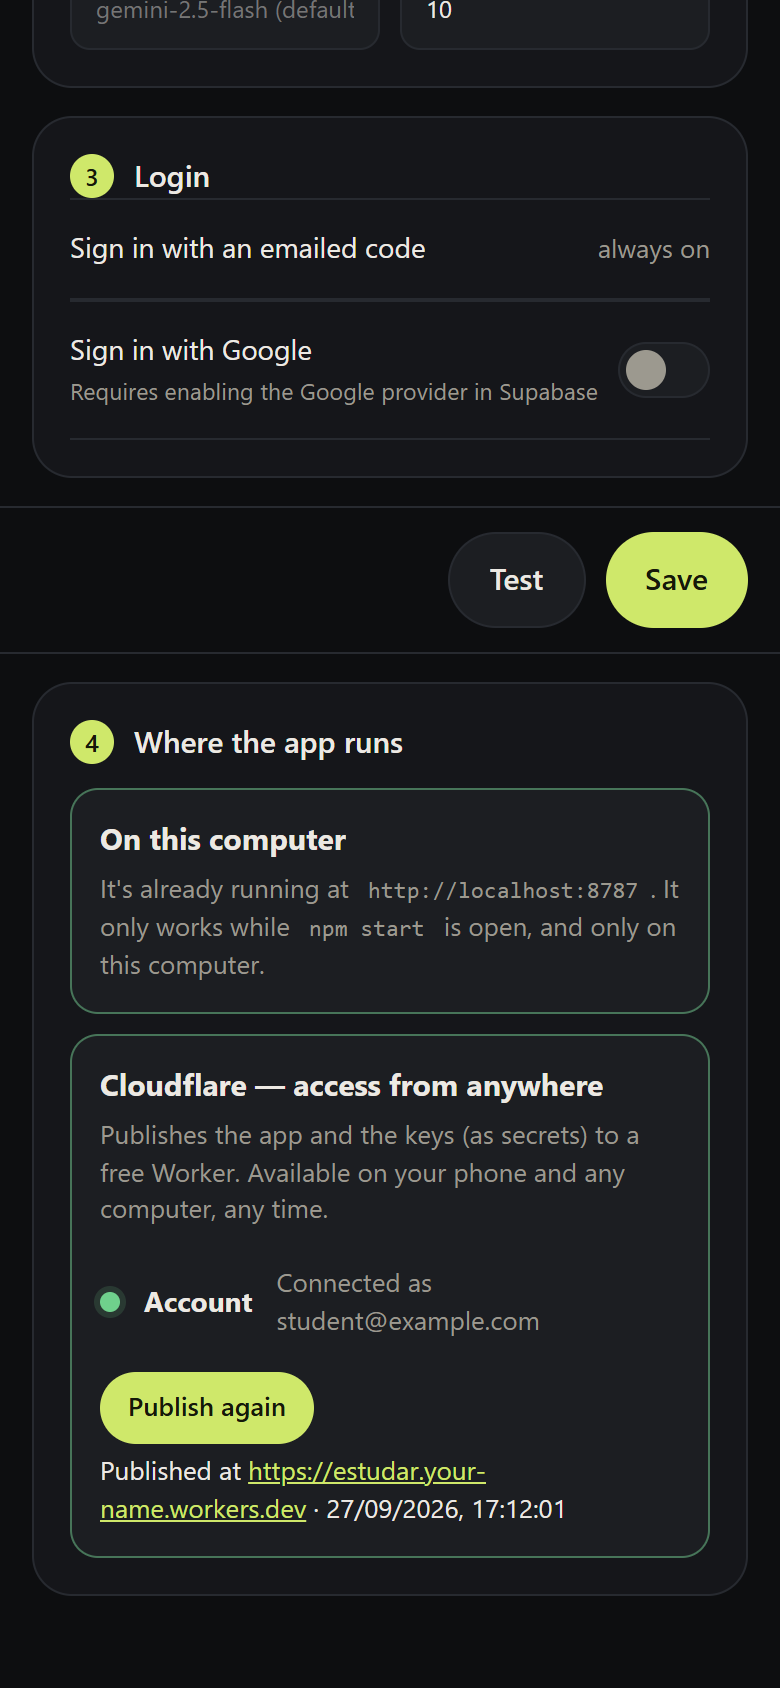
In step 4, Where the app runs, you choose:
- On this computer — it's already working, as long as the terminal running Estudar is open.
- Cloudflare — access from anywhere:
- Connect Cloudflare account opens the browser so you can authorise Wrangler.
- Publish to Cloudflare uploads the app to a Worker and the keys as secrets of that Worker. The log appears on screen.
- The app is live at
https://estudar.<your-account>.workers.devand the Cloudflare dot turns green.
First time on Cloudflare Workers?
If your account doesn't have a workers.dev subdomain yet, publishing fails with a message explaining why. Open dash.cloudflare.com → Workers & Pages, pick a name and click Publish again.
4. Install it on your phone
Open the published address on your phone and sign in with your email (you'll receive a 6-digit code).
- Android (Chrome): ⋮ menu → Install app.
- iPhone (Safari): Share → Add to Home Screen.
The app opens full screen, works offline and syncs when it's back online.
Other people using your installation
- Email: the email server built into Supabase only sends to members of the project's team and has low limits. For other people, set up your own SMTP in Authentication → Emails → SMTP Settings (for example, Resend, which has a free tier).
- Private installation: turn off Allow new users to sign up and invite people in Authentication → Users.
- Sign in with Google: coming soon. For now, sign-in is by email code only.
From the command line
If you'd rather not use the screen:
npx wrangler login
npx wrangler deploy
npx wrangler secret put SUPABASE_URL
npx wrangler secret put SUPABASE_ANON_KEY
npx wrangler secret put AI_API_KEY
# optional: SUPABASE_SERVICE_KEY, AI_PROVIDER, AI_MODEL, AI_BASE_URL, MAX_PLANS_PER_DAY, AUTH_GOOGLE
The full list of variables is in Server & keys.
Static files only
The public/ folder also works on its own (GitHub Pages, Netlify, python -m http.server). Without the API, the app runs in local mode: no account, no sync, no AI.